How to Shape Choice-making in Children with Complex Communication Needs 101

By Andrea Song, M.Ed., CCC-SLP
Think about your own experience at the local diner. You go in on a Saturday morning for breakfast. The waiter approaches you to take your order, and you say that you would like eggs and toast. The waiter asks you how you like your eggs: scrambled, sunny side up, over easy (these are really only a few of many choices). Then you are asked about what kind of bread you would like for your toast: wheat, white, sourdough, English muffin, and on and on.
What does it take for you to make a choice that is reliable and true to what you really want? How are you able to communicate your preferences to others? It helps us to think about our own experiences with choice-making in order to understand what it takes to shape the skill of genuine, reliable choice-making in our students with complex communication needs.
Discover Enjoyment
At its core, reliable choice-making is finding enjoyment and pleasure in that preferred selection. Before we can begin to shape choice-making in our students, we need to learn what motivates them. What makes them happy? Clearly, one way we can discover this information is through family and caregiver interviews, but use your own observations too. Give your student access to varied, colorful experiences and open them up to the sensory-rich world that surrounds them. Utilize every sensory mode they have available in order to uncover what gets them to express enjoyment, such as olfactory (smell), gustatory (taste), tactile, kinesthetic (movement), auditory, visual, and even vestibular (movement in space).
As you expose them to various experiences, observe their natural behaviors in response to motivating stimuli. Does the child smile? Vocalize with pleasure? Extend or flex a particular area of their body, like their arms or legs? Do they fix their gaze on the desired object? Keep a close watch and observe what natural behaviors they demonstrate most consistently when interacting with preferred items. Later on, this natural behavior can be shaped into an intentional signal during choice-making opportunities.
Build Intentionality
After we discover what motivates them, we need to teach them that there is power in their natural behaviors--the power to change their environment. The ability to use behaviors in an intentional, functional way is an important prerequisite to making meaningful choices. One of the primary ways of shaping a natural movement into an intentional signal is through pairing a communicative function with the movement. Which communicative function do we teach first? Requesting “more”, as it is one of the earliest communicative functions that develop. How do we pair the function with the movement? Allow the child to experience and interact with the highly motivating stimulus; gently remove it from them; then, respond to whatever natural behaviors they provide by bringing back the motivating stimulus.
Depending on what’s appropriate for the student, you can also use other teaching strategies like modeling (as appropriate), explicit verbal instruction (e.g., “Use your voice”), providing ample processing/wait time, and other multimodal cues (e.g., movement of the object, tapping their hand) to elicit the targeted behavior. Hopefully, through implementing these strategies, the child will learn that their behaviors have rewarding consequences and can positively affect their world around them.
Preferences: What Do They Like AND Dislike?
To be able to make a reliable choice that reflects your true preferences, you have to be able to not only know what you want but also know what you do NOT want. In addition to discovering what the child enjoys, we need to collect an inventory of what they seem to dislike or to be uninterested in. Of course, the first choices we provide need to be concrete and familiar. But, we can provide additional support by including either nonpreferred choices or meaningless choices alongside the highly preferred choice. For example, if a child shows consistent enjoyment for goldfish and shows a disinterest in strawberries, we can present both of these choices to the child as they learn the system and method of choice-making. This also helps us, the facilitators, know whether the child has truly learned to communicate what they want.
How to Present Choices
There are many ways to present choices. “Do you want crackers or juice?” “Crackers?” “Juice?” We can “scan” through the choices one by one. If the choices can be represented by photo icons or real object representations, we can lay it out in an array or field. One method of presenting choices that we have found very beneficial particularly for students with physical challenges is a method called live voice scanning (LVS), also known as partner assisted scanning (PAS). As the facilitator scans through the choices, the student signals with a ‘yes’ response (e.g., smile, vocalization) to indicate his or her selection.
Remember to start by providing smaller arrays of choices. Consider the cognitive abilities of each child when determining how many choices in an array they can handle. Even for typical adults, having too many choices can be intimidating and a communication breakdown can occur.
The ‘Yes’ Signal
For typical communicators, some of the methods we use to signal our choice are with speech, head nods/shakes, or gestures. If we were to use our speech, we would label that particular choice or we would say “yes” or “no”. If we were to gesture our choice, we would point to the particular item.
For students with complex communication needs, they may need an alternative way of signaling their choice, and the signal will depend on their physical, cognitive and sensory abilities and needs. Consider what the most natural signal would be to an unfamiliar partner communicating with them. What is most conspicuous and obvious? What is easiest and efficient to use? For instance, an arm raise is more conspicuous than a smile, but a smile is more natural. Consider and outweigh all the possibilities before landing on a signal, and keep in mind that a child may have more than one way of signaling.
All in all, choice-making may look different for each child. It may also look different depending on the setting and the communication partners involved. We need to remember that the strategies and systems we develop must be individualized and catered to each child’s abilities and needs.
Standers
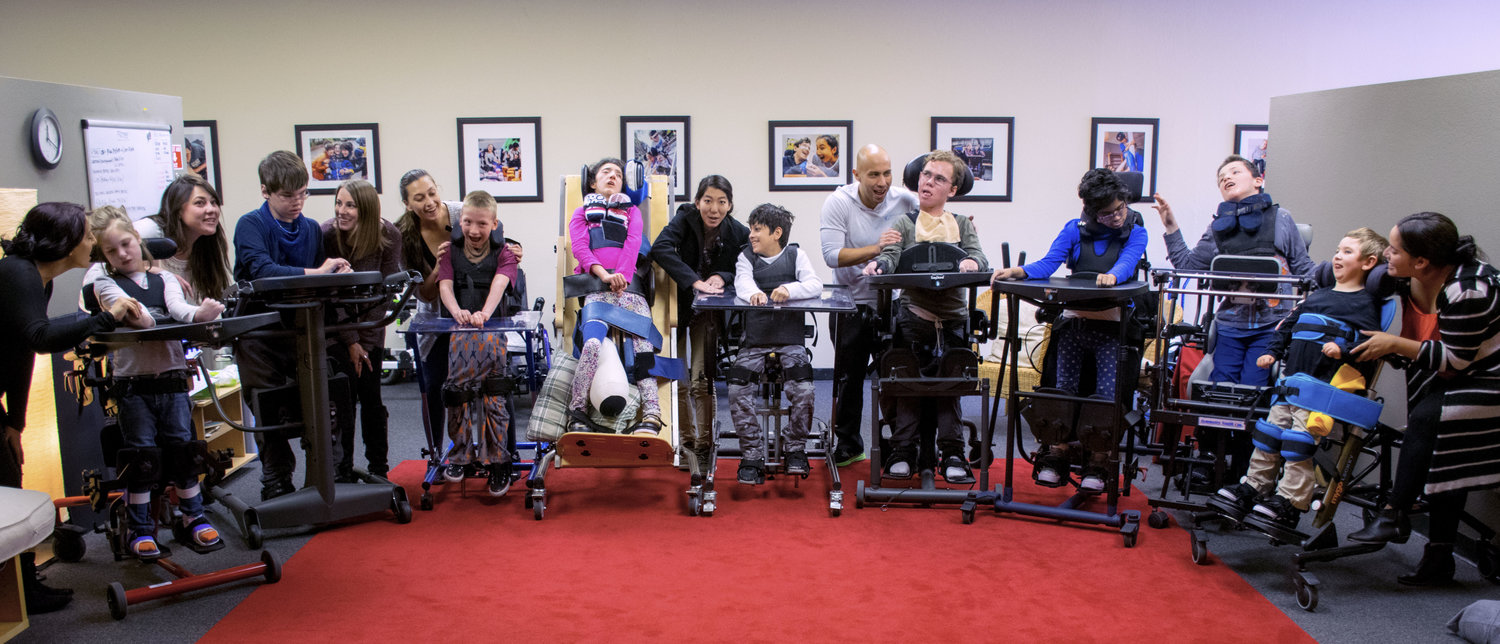
The consistent use of a standing frame can be beneficial for a student’s overall health, learning, and social integration. We encourage the use of standing frames for our students who need more assistance and support to assume an upright position as part of their educational program. Standers can provide the following:
1. Opportunity to experience an upright standing position in an upright well-supported posture.
2. Develop weight bearing and head control.
3. Reduce deformities of the trunk, pelvis, and limbs.
4. Improve joint range of motion.
5. Promote hip integrity and minimize threatening hip subluxation.
6. Encourage visual, proprioceptive and perceptual experiences in varied positions against gravity.
7. Enable communication with peers, teachers, and family in play or social activities at standing level.
8. Develop upper extremity and hand function in upright standing posture.
9. Contribute to the prevention of bone density problems.
10. Offer physiological benefits for bladder, bowel, circulation, and respiration by position change. (Levitt 205)
Source: Levitt, Sophie. Treatment of Cerebral Palsy and Motor Delay. Wiley-Blackwell, 2010.
Wheelchair Positioning for the Classroom

Optimal seating and positioning is essential for student access and learning while in the classroom. At The Avalon Academy, we make it a priority to check our students’ positioning at the start of class, as well as when students prepare for community outings.
It is important for us as therapists, teachers, parents, and caregivers to understand what key elements to look for and also why we need to assess these areas of positioning so we may provide the best foundation for our students success. Below, we will go over a head-to-toe review of seating:
CHAIR POSITION
Many of our students have an option for their wheelchair to tilt-in-space. The option to tilt-in-space is useful when a student may not have the head and upper body control and/or strength to maintain their head and trunk upright for long durations. Tilting backwards to a reclined position gives the student the availability to rest from the demands of gravity. In addition to endurance, modifying the tilt can also help with trunk alignment, breathing, speaking, and eating.
When we think about the classroom, it is an active setting where our students access their assistive augmented communication devices through individualized body switch access points to share and make choices. Additionally, all are encouraged to participate and explore in multi-sensory materials (e.g. feeling objects, smelling or tasting related items). Students are also asked to visually attend to supporting icons, and media materials. Participation in class requires physical interaction, thus it is necessary to set up our students in the best position for each student to be an active learner.
The ideal position for a student with limited postural control with a tilt-in-space option is one against gravity that allows the student’s head to be supported from behind on their headrest, with their shoulders in favor of the direction of the seat back. It is a fine line to position the chair so that the student is encouraged to actively position their head to engage with the class materials, but not too demanding where the physical demand of bringing and maintaining their head up becomes the focus and interrupts learning. The degree of tilt is all individual, but generally, we want to see that the student is not slouched forward from the shoulders and can independently bring their head up and attend to material without fatigue for the duration of a class period. However, it should not be too tilted where they are resting and cannot engage in material. It is worthy to note that the greater the tilt, the harder it is for arm access to reach and engage with educational material.

HEAD & NECK
As a physical therapist, optimal sitting is with a head in “anatomic neutral” where the head is directly stacked over the neck and spine. With our students, we have a different set of rules when this cannot be achieved. Often we need to modify the position of a headrest to support the head in a slightly forward, or slightly back position. When a student’s position of comfort is with upper cervical extension (e.g. head hinges backwards at the base of the head and top of the neck) we want the headrest to be positioned slightly forward of the shoulders to meet the position of their head when it is upright.
SHOULDERS
We look for shoulders to be supported against the seat back, often with the help of chest straps that go over the front of the chest. The chest straps should be snug against the body. If a student is using a butterfly or “H” style harness, we take care to keep the front neck area clear and airway open by ensuring that the straps are pulled snug and there is a fist width gap from the top of the sternum (base of the neck) and the harness. The seat back should be as high or higher than shoulder height to work in conjunction with the front chest strap to guide the shoulders to rest on the seat back.

TRAY
Generally, all of our students use a tray during class. Often, the tray provides a platform for switch access and AAC use. In addition, students can sometimes use the support of the tray against their forearms to help stabilize and prop their body upright. When using a tray, we look to see that the elbows are resting and supported on the tray. If the tray it too high, the shoulders will shrug up to the ears and can encourage a slouched forward position.
HIPS
Although this list takes us from top to bottom, the hips are the keystone to alignment and is starting point for seating. It is essential to ensure that the hips are positioned completely back against the back of the seat with equal weight over each hip. This position allows the trunk to rest against the seat back, which then allows for better and easier head control. If the hips are not secured back, students often slide forward in their seat due to gravity or extensor hip thrust, The result is the student in a slouched position, which essentially “turns off” the student’s postural muscles and results in difficulty with head and arm control, reducing active participation in the classroom.
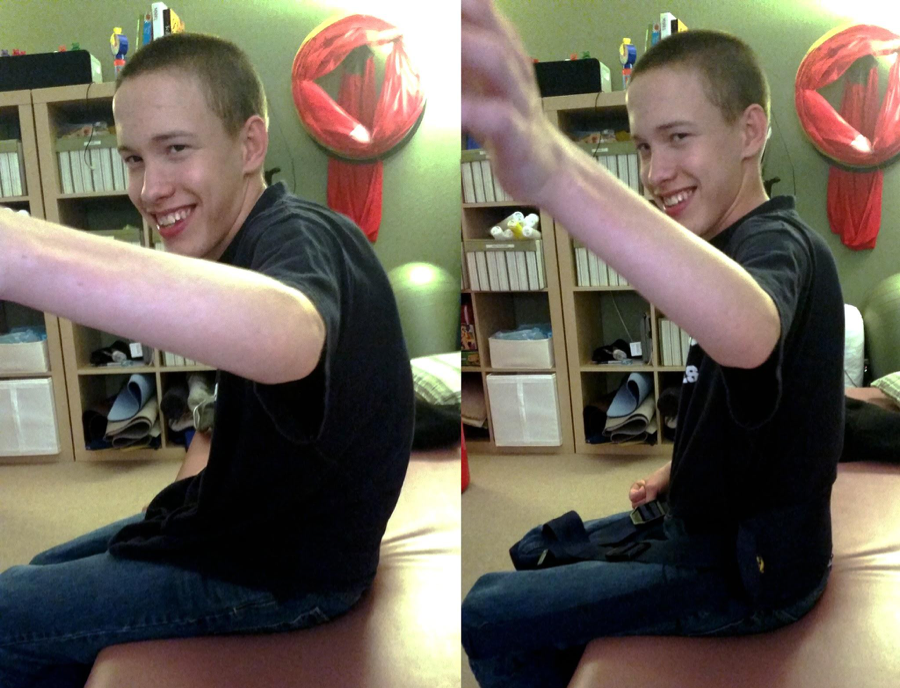
Notice: (left) Student in preferred slouched position with hips forward, resulting in rounded back, altered head position, and reduced reaching range. (right) Student with hips aligned with trunk resulting in better alignment in the head and shoulders
FEET
The feet can be thought of as the point of stability and grounding for students. The feet should be secured by ankle and foot straps as necessary to maintain contact with the foot plates and align the knees at 90 degrees. Securing the feet so that the knees are bent at 90 degrees will also help keep the hips from sliding forward for students who tend to extend and straighten their legs.
We hope this general guideline for positioning is a helpful tool for the classroom and beyond. For more complex seating needs, please start a conversation with your student’s physical therapist to discuss additional and alternative accessories and custom modifications to help achieve optimal seating. Let’s remember: a good foundation in positioning is key to active learning!